Table of Contents
- Quick Answer
- Can Your Mac mini and MacBook Support Two External Displays?
- Studio Display 2022 vs. 2026: What Changes?
- Recommended Mac mini + MacBook Connection Diagram
- Cable and Port Checklist
- Step-by-Step Setup
- Dock vs. Monitor Input Switching vs. KVM
- Where TESmart TKS202-X4 Fits
- Camera, Microphone, Speakers, USB, and Charging
- Common Problems After Switching
- Related Guides
- FAQ
- Conclusion
Quick Answer
To share two Apple Studio Displays between a Mac mini and a MacBook, each Mac must natively support two external displays, and the switching path must preserve the display and data connection required by each Studio Display. A standard HDMI KVM or a USB-C dock is not a direct substitute because Apple Studio Display does not use a conventional HDMI input.
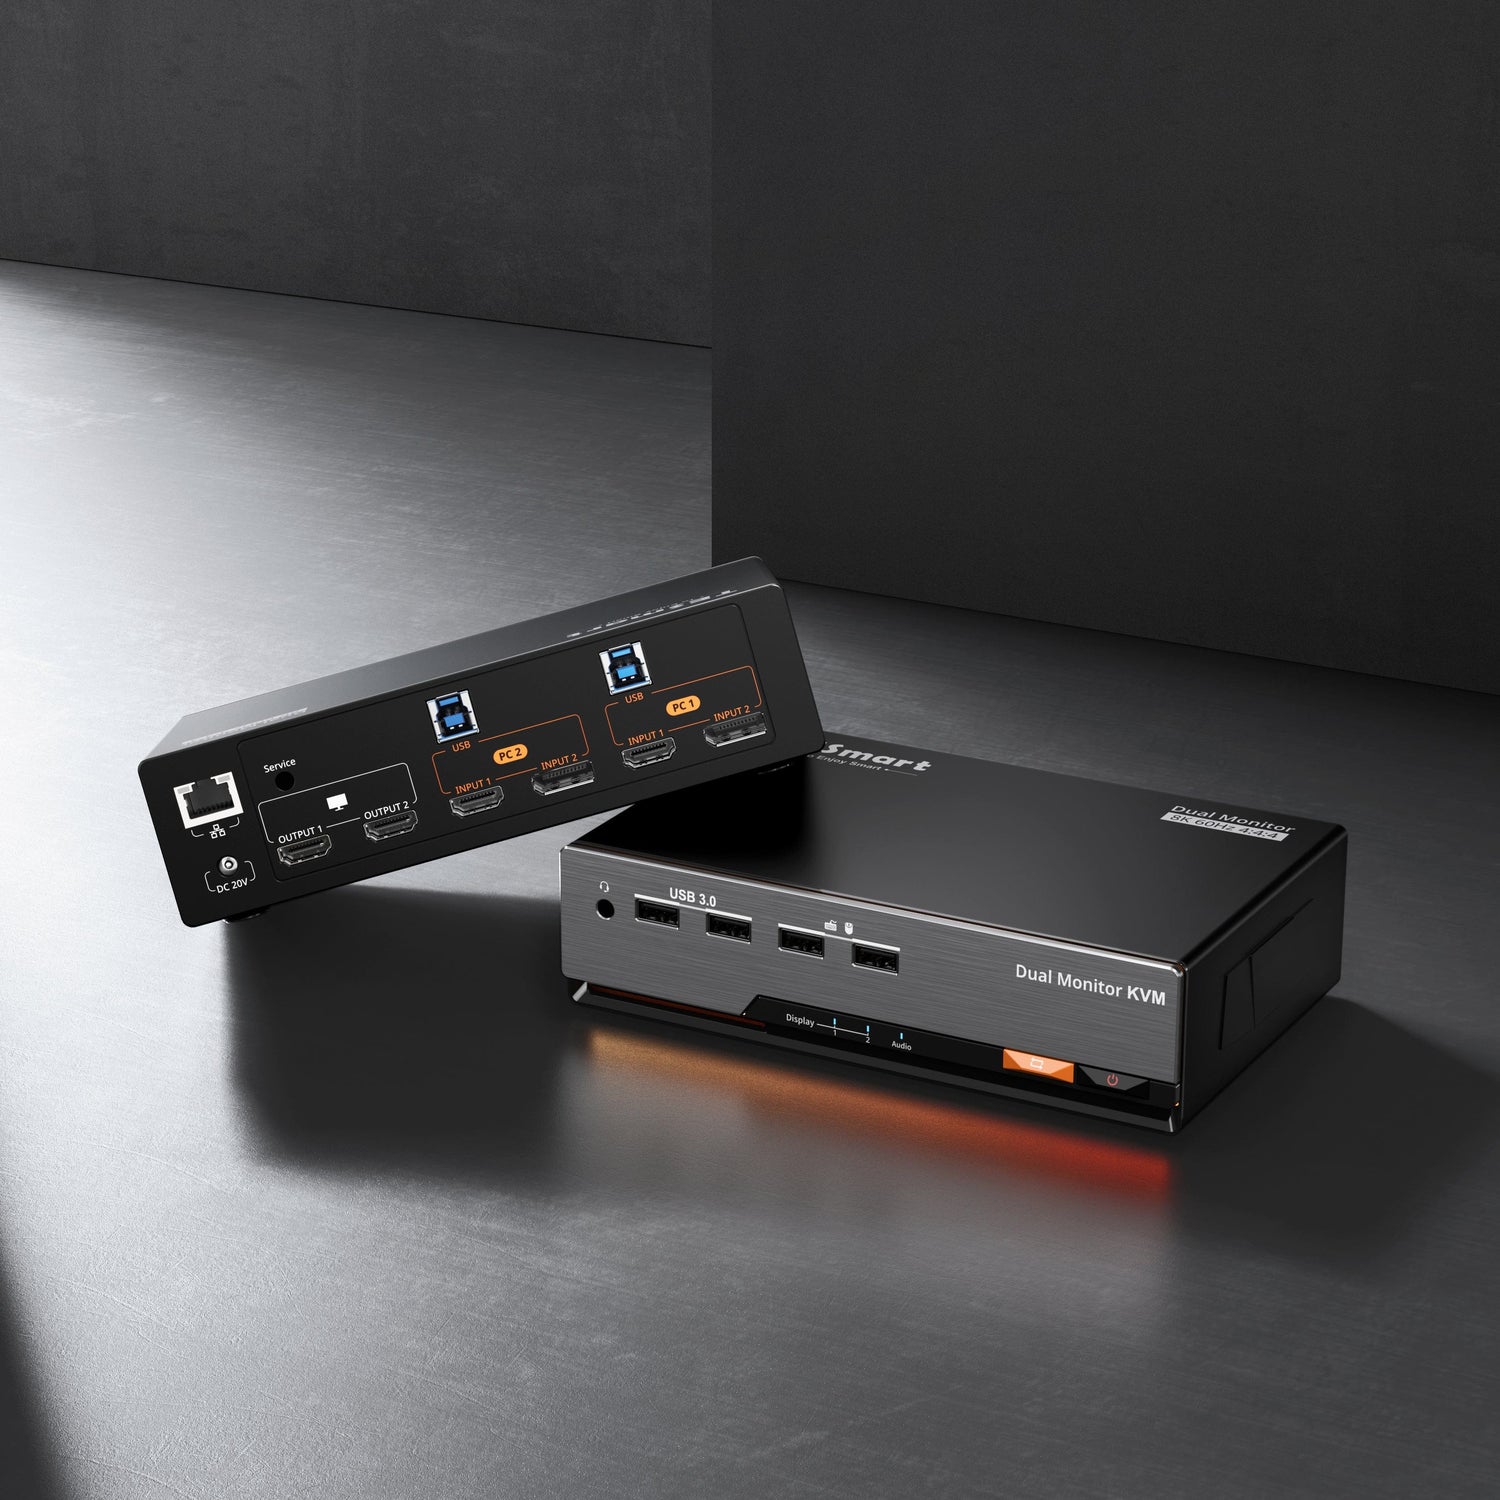
A two-computer, two-display KVM compatible with Thunderbolt 4 devices—such as TESmart TKS202-X4—is the relevant product category for this desk. Before purchase, confirm the exact Mac chips, Studio Display generation, simultaneous dual-5K mode, host charging requirements, cable specifications, and whether the camera, microphone, speakers, and downstream USB ports have been validated in your intended configuration.
This guide is intentionally narrow. It covers one Mac mini and one MacBook sharing two Apple Studio Displays. If your desk uses standard HDMI or DisplayPort monitors, a conventional dual-monitor KVM is usually simpler and less expensive.
Can Your Mac mini and MacBook Support Two External Displays?
A KVM cannot create display outputs that the Mac does not support. Both computers must natively drive two external displays in the required resolution, refresh rate, and lid state.
| Mac | Planning note for two Studio Displays |
|---|---|
| Mac mini with M1 | Its two-display mode uses one Thunderbolt display path and one HDMI path, so it is not the straightforward choice for two Studio Displays through two direct Thunderbolt connections. |
| Mac mini with M2 | Supports two external displays in specified Thunderbolt or mixed Thunderbolt/HDMI combinations. Confirm the exact dual-Thunderbolt mode. |
| Mac mini with M2 Pro, M4, or M4 Pro | Supports two or more external displays, depending on resolution and refresh rate. These are generally better candidates. |
| MacBook Air with M4 or M5 | Supports two external displays in addition to the built-in display, subject to Apple’s supported modes. |
| Base M3 MacBook Air or MacBook Pro | Supports two external displays with the lid closed. Plan for external power, keyboard, and mouse. |
| Other MacBook models | Support varies by chip. Some earlier base-chip models support only one native external display. |
Confirm the exact model on Apple’s display-support pages for Mac mini, MacBook Air, and MacBook Pro.
Studio Display 2022 vs. 2026: What Changes?
The two Studio Display generations share a 27-inch 5K panel format, but their connection layouts are not identical. That difference matters when the display is part of a switched workstation.
| Item | Studio Display 2022 | Studio Display 2026 | KVM consideration |
|---|---|---|---|
| Host connection | One upstream Thunderbolt 3 port | One upstream Thunderbolt 5 port | The display still requires a compatible host-side connection; connector shape alone is not enough. |
| Downstream ports | Three USB-C ports up to 10Gbps | One downstream Thunderbolt 5 port plus two USB-C ports up to 10Gbps | The 2026 model adds a Thunderbolt downstream path; the 2022 model does not have the same topology. |
| Host charging | Up to 96W from the display’s host port | Up to 96W from the display’s host port | Do not assume that display charging passes through every KVM path unchanged. Confirm KVM host power delivery separately. |
| Daisy-chain support | No downstream Thunderbolt display port | Downstream Thunderbolt 5 can connect high-speed accessories or daisy-chain additional displays | Daisy-chaining does not increase the Mac’s native display limit and should not be assumed to work through an untested switching chain. |
| Mac software baseline | Broad Mac compatibility with macOS Monterey 12.3 or later, subject to Apple’s model list | Apple silicon Macs with macOS Tahoe 26.3.1 or later, subject to Apple’s model list | Confirm the display generation and macOS version during troubleshooting. |
See Apple’s official specifications for Studio Display introduced in 2022 and Studio Display introduced in 2026.
Important: The 2026 Studio Display can connect to compatible Macs that do not have Thunderbolt 5, but that does not automatically prove compatibility with every KVM. For TKS202-X4, confirm the 2026 display generation, simultaneous dual-display mode, integrated-device behavior, and cable combination with TESmart before purchase.
Recommended Mac mini + MacBook Connection Diagram
The cleanest topology uses one direct host connection from each Mac to the KVM and one direct display connection from each KVM output to each Studio Display. Avoid placing a dock, adapter chain, or extension cable between these devices unless that exact chain has been validated.
Host 1 connection
Host 2 connection
Two host inputs
Two display outputs
Keyboard, mouse, USB, audio, Ethernet
Display Output A
Display Output B
Recommended direct topology: Mac mini → Host 1; MacBook → Host 2; Display Output A → Studio Display 1; Display Output B → Studio Display 2. Connect the keyboard, mouse, USB devices, Ethernet, and analog audio to the appropriate shared ports on the KVM.
This diagram shows the logical path, not a promise that every Mac and Studio Display combination will run the same resolution or integrated functions. Validate both hosts individually with both displays before adding the KVM.
Cable and Port Checklist
High-bandwidth dual-display failures often begin with the wrong port or a cable that supports charging but not the required data and video mode.
- Host cables: one suitable high-bandwidth cable from each Mac to its KVM host input.
- Display cables: one cable from each KVM output to the upstream host port on each Studio Display.
- Power: connect both displays and the KVM to their normal power sources.
- Input devices: place the keyboard and mouse on dedicated KVM ports when available.
- Fast peripherals: place storage and other high-data devices on the faster shared USB ports.
- MacBook charging: use the MacBook charger until the KVM’s host charging output is confirmed.
- Cable length: keep every segment short and direct. The available TKS202-X4 sheet does not state one universal maximum length for every dual-display mode.
- Avoid extensions: passive USB-C extensions and unverified couplers add another negotiation point.
Connector shape is not a cable specification. A USB-C cable may charge a laptop while failing to carry the bandwidth needed for this workstation.
Step-by-Step Setup
- Confirm native display support. Check the exact Mac mini and MacBook models on Apple’s display-support pages. Verify that both hosts can run two external displays in the intended lid state.
- Test each Mac directly. Connect both Studio Displays directly to the Mac mini, then to the MacBook. Confirm resolution, wake behavior, audio, camera, microphone, USB ports, and charging before introducing the KVM.
- Power down the chain. Shut down or disconnect the two hosts, turn off the KVM, and leave both displays powered.
- Connect the hosts. Connect the Mac mini to Host 1 and the MacBook to Host 2 using the shortest suitable high-bandwidth cables.
- Connect both displays. Run Display Output A to Studio Display 1 and Display Output B to Studio Display 2. Use the upstream host port on each display.
- Connect shared devices. Add the keyboard, mouse, Ethernet, audio, and USB peripherals. Start with only essential devices; add high-bandwidth peripherals after the basic display switching works.
- Power on in order. Turn on the displays, then the KVM, then the active Mac. Allow macOS to finish detecting both displays before switching hosts.
- Set the display arrangement. In macOS, open System Settings > Displays, arrange the screens, confirm scaling, and select the preferred audio input and output devices.
- Test switching from a stable state. Avoid switching while the Mac is entering sleep, installing a display update, or writing to shared storage. Test both “both displays follow one host” and independent-display modes separately.
Dock vs. Monitor Input Switching vs. KVM
These devices solve different problems. A dock expands one computer. Monitor input switching changes a monitor’s source. A KVM moves the workstation between computers.
| Method | What it solves | Main limitation for this desk | When it makes sense |
|---|---|---|---|
| USB-C or Thunderbolt-compatible dock | Adds ports, network, USB devices, and displays to one host | It normally does not switch the complete desk between a Mac mini and MacBook | One main computer needs port expansion |
| Monitor input switching | Changes video source on a display with multiple inputs | Studio Display does not provide conventional HDMI/DP input buttons, and this method does not coordinate keyboard, mouse, or USB devices | Standard monitors have suitable inputs and USB is handled separately |
| Standard HDMI or DisplayPort KVM | Switches video and USB for conventional monitors | It does not provide the native host connection expected by Apple Studio Display | The monitors use HDMI or DisplayPort |
| KVM compatible with Thunderbolt 4 devices | Routes compatible host/display paths and shared peripherals between two computers | Exact Mac, display generation, cable, charging, and integrated-device behavior still need validation | Two compatible hosts need to share two Studio Displays and desk peripherals |
Where TESmart TKS202-X4 Fits
TKS202-X4 is intended for a two-host, two-display workstation built around compatible Thunderbolt display paths. That makes it more relevant to a Mac mini + MacBook + dual Studio Display desk than an HDMI KVM or a dock designed for one laptop.
It is also a specialized choice. Users with one display, mixed HDMI devices, or ordinary USB-C monitors should not assume that TKS202-X4 is automatically the most suitable or economical route.
Documented Specifications and Items to Confirm
| Item | Available TKS202-X4 documentation | Pre-purchase check |
|---|---|---|
| Host and display count | Two computer inputs and two display outputs | Confirm both Macs support two external displays |
| Host/display connection | Thunderbolt 4-compatible input and output paths | Confirm the exact Studio Display generation and cable set |
| Transmission rate | Up to 40Gbps listed | Do not treat link rate alone as proof of a specific dual-display mode |
| 5K output | Documentation lists up to 5K at 60Hz for a single output | Confirm simultaneous dual-5K at 60Hz with both Studio Displays and both host models |
| High-refresh 4K | Documentation lists up to 3840 × 2160 at 160Hz, 4:4:4 | Confirm whether the target mode applies to one or both outputs and to the chosen display type |
| Display switching | Front-panel, hotkey, and infrared control; independent display selection is listed | Test both synchronized and mixed-host display modes |
| USB | Front USB-A and USB-C ports listed at up to 10Gbps; rear shared USB-A ports listed at up to 5Gbps; dedicated keyboard/mouse ports | Place high-speed devices on the correct ports and test storage safely |
| Network | Gigabit Ethernet | Confirm macOS network-interface behavior after switching |
| Audio | Analog audio and microphone connections | Confirm whether you plan to use analog audio or Studio Display audio devices |
| MacBook charging | Exact host charging wattage is not stated in the available specification sheet | Confirm with TESmart or use the MacBook’s own charger |
| Studio Display camera, mic, speakers, and hub | Not enough public model-specific test detail to promise every function in every configuration | Confirm the exact tested Macs, macOS version, display generation, and cable lengths |
Compatibility and certification wording: TKS202-X4 should be described as a KVM compatible with Thunderbolt 4 devices, not as a “Thunderbolt 4 KVM” product identity. Compatibility language does not imply Intel Thunderbolt certification. Confirm the current certification status with TESmart if certification is required for your organization.
Before ordering: Review the TKS202-X4 product manual and contact TESmart support with your exact Mac models, Studio Display years, desired resolution, lid state, cable lengths, charging requirement, and integrated-device needs. This is safer than relying on a generic product label.
Camera, Microphone, Speakers, USB, and Charging
A visible 5K image proves only that the display signal works. Studio Display camera, microphone, speakers, and downstream ports also require data communication with the active Mac.
- Camera and microphone: confirm that Studio Display appears in macOS and in the conferencing app after every switch.
- Speakers: macOS may keep the previous audio output. Re-select Studio Display in System Settings > Sound.
- Downstream USB: test devices individually. A keyboard may work even when a high-speed SSD exposes a bandwidth or reconnection problem.
- Charging: Studio Display provides up to 96W when directly connected, but a switched path can change power delivery. Use the MacBook charger until TKS202-X4 host charging is confirmed.
For a function-level checklist, see Does a Thunderbolt-Compatible KVM Preserve Apple Display Camera and Speaker Functions?
Common Problems After Switching
Only one Studio Display works
Confirm that the active Mac supports two external displays in the current lid state. Swap the two display cables and outputs. Then remove docks, adapters, and extensions and retest the shortest direct chain.
Both displays remain black
Switch back, power-cycle the KVM, and restart with one display connected. Add the second display after the first path is stable. Also test both displays directly with the same Mac and cables.
Windows move to the wrong screen
macOS may treat a switch as a display disconnect. Keep each display on the same KVM output, use consistent scaling, and avoid switching while the Mac is entering or leaving sleep.
USB or integrated display devices do not follow
Confirm that shared devices use KVM ports, re-select audio and camera devices in macOS, and test the Studio Display directly. Eject storage before switching. If a function works only when directly connected, ask whether that exact configuration has been validated.
The MacBook does not charge
Use the MacBook charger. Charging is separate from video and data, and the available TKS202-X4 specification sheet does not state an exact host charging wattage.
Related Guides
- How to Choose a KVM for Apple Studio Display — use this for the broader product-category decision.
- Do You Still Need a KVM for the 2026 Apple Studio Display? — use this for the new downstream Thunderbolt 5 topology.
- MacBook Multi-Monitor Setup Guide — use this to check MacBook display limits, docks, and clamshell requirements.
- Why KVM Switches for Apple Studio Display Are Still Rare — use this for the protocol and product-category background.
FAQ
Can TKS202-X4 run two Apple Studio Displays at 5K 60Hz?
The available documentation lists up to 5K at 60Hz for a single output, but it does not provide enough public detail to promise simultaneous dual-5K operation with every Mac and both display generations. Confirm the exact configuration with TESmart.
Can a MacBook Air drive two Studio Displays?
M4 and M5 MacBook Air models support two external displays in addition to the built-in display. Base M3 models require the lid to be closed. Earlier models vary.
Can I daisy-chain two 2026 Studio Displays?
The 2026 model has a downstream Thunderbolt 5 port for daisy-chaining, but this does not increase the Mac’s native display limit or prove that the chain works through TKS202-X4.
Will the camera, microphone, speakers, and USB ports work?
They require data as well as video. Confirm the exact Studio Display generation, Mac, macOS version, cables, and TKS202-X4 test result.
Can a normal HDMI KVM work with adapters?
Apple Studio Display expects a compatible Thunderbolt host path. Simple adapters do not reproduce the complete display, data, audio, camera, and charging relationship.
Is TKS202-X4 Intel certified for Thunderbolt?
Do not infer certification from compatibility wording. Ask TESmart for current certification status if formal certification is required.
Conclusion
A reliable Mac mini + MacBook dual Studio Display setup begins with host capability, not the KVM. Both Macs must support two external displays in the required mode. The Studio Display generation, macOS version, cable bandwidth, and integrated-device requirements then determine whether the complete chain is practical.
TKS202-X4 is relevant when the desk has two compatible hosts, two Apple Studio Displays, and shared keyboard, mouse, USB, network, or audio devices. Its two-host, two-display structure and independent display selection address the correct workstation problem. At the same time, the available public specifications leave several configuration-specific questions—especially simultaneous dual-5K operation, MacBook charging wattage, and full Studio Display peripheral behavior—that should be confirmed before purchase.
The right next step is to test both Macs directly with both displays, document the required resolution and functions, then ask TESmart to confirm that exact configuration. That produces a more dependable setup than choosing by connector name alone.