

Table of Contents
- Introduction
- What This Problem Usually Means
- How a Traditional Dual-Monitor KVM Signal Path Works
- 1. Check Where the Desktop Video Cables Are Connected
- 2. Confirm the Desktop Is Supplying Two Video Signals
- 3. Keep Video and USB Connections in the Same PC Input Group
- 4. Do Not Expect the USB Connection to Carry Video
- 5. Check HDMI and DisplayPort Adapter Direction
- 6. Test Each Desktop Output Without the KVM
- 7. Check Windows and GPU Display Settings
- 8. Reduce Resolution and Refresh Rate Before Blaming the KVM
- Quick Diagnostic Table
- Which TESmart KVM Fits This Type of Desktop Setup?
- Related TESmart Guides
- FAQ
- Conclusion
Introduction
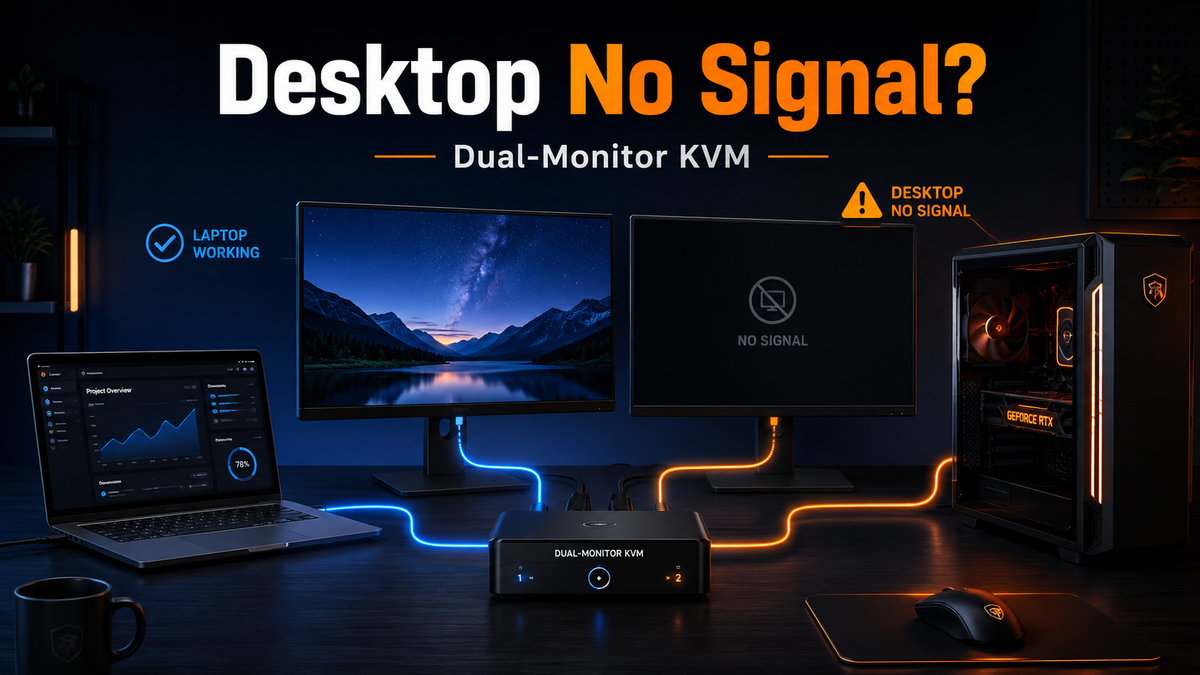
Your work laptop connects to a dual-monitor KVM and both screens appear normally. You switch to the gaming desktop, and suddenly only one monitor works—or both displays report no signal.
It is easy to assume that the desktop needs KVM software, a special USB driver, or a different switching mode. With a conventional HDMI or DisplayPort KVM, however, the more useful question is usually much simpler:
Are two valid video signals actually reaching the KVM from the desktop?
A dual-monitor KVM does not normally create a second display signal for the computer. It switches the video signals that each computer provides. That distinction explains why the same KVM can work perfectly with one computer while appearing completely broken with another.
This guide focuses on that specific failure pattern. Instead of treating “no display” as one problem, we will trace the desktop signal path from the graphics card to the KVM and then to each monitor.
What This Problem Usually Means
If the laptop can already drive both monitors through the KVM, several parts of the setup have effectively passed an initial test: the KVM can power on, its monitor-side connections can carry video, and the displays are capable of receiving a switched signal.
That does not prove that every KVM port or cable is good, but it shifts the first troubleshooting priority toward the desktop side.
The most common desktop-side questions are:
- Are both video cables connected to active outputs?
- Are both connected to the dedicated graphics card rather than splitting between the GPU and motherboard?
- Does the desktop actually recognize two monitors when the KVM is bypassed?
- Are the two video connections assigned to the same KVM PC input group?
- Is an HDMI/DisplayPort adapter being used in the correct direction?
- Is Windows configured to extend or duplicate to the second display?
- Is the requested resolution or refresh rate supported by the entire signal path?
This is why replacing the KVM should not be the first step. A structured signal-path check usually identifies the failure much faster.

How a Traditional Dual-Monitor KVM Signal Path Works
For a conventional two-computer, two-monitor HDMI or DisplayPort KVM, think of the setup as several independent connections rather than one large connection.
A typical desktop path looks like this:
Desktop GPU video output 1 → KVM PC input A → KVM monitor output A → Monitor 1
Desktop GPU video output 2 → KVM PC input B → KVM monitor output B → Monitor 2
A separate USB upstream connection normally handles keyboard, mouse, and shared USB communication:
Desktop USB port → KVM USB upstream port
The important point is that these paths have different jobs.
In a traditional HDMI/DP KVM, plugging in the USB cable does not replace one of the video cables. Likewise, connecting one DisplayPort or HDMI output from the desktop does not normally give the KVM two independent extended displays.
If you are still planning the basic wiring, TESmart's KVM setup guide covers the broader installation process. The checklist below deals specifically with cases where one computer already works and the desktop does not.
1. Check Where the Desktop Video Cables Are Connected
This should be the first check on a gaming PC or workstation with a dedicated graphics card.
Look at the back of the computer. Video ports are often available in two physically separate areas:
- Motherboard video outputs, located near USB, Ethernet, and audio ports.
- Dedicated GPU outputs, located lower on the chassis on the graphics card itself.
If your desktop uses an NVIDIA or AMD graphics card, connect both KVM video feeds to outputs on that graphics card whenever possible.
A common mistake is:
Monitor path 1 → DisplayPort on dedicated GPU
Monitor path 2 → HDMI on motherboard
The motherboard HDMI or DisplayPort connector is not simply an extra connector for the dedicated GPU. It is normally associated with the CPU's integrated graphics hardware.
If the processor does not provide integrated graphics, the motherboard video output may produce no signal at all. Even when integrated graphics are available, firmware or operating-system configuration may determine whether they remain active alongside the dedicated graphics card.
For a conventional dual-monitor gaming setup, using two outputs from the same discrete GPU removes this variable and keeps both display paths under the same graphics driver.
Recommended check: follow both KVM input cables physically back to the desktop and verify that both terminate on the graphics card.
2. Confirm the Desktop Is Supplying Two Video Signals
A dual-monitor KVM normally needs two usable video signals from each computer if you want two independent displays.
For two computers sharing two monitors, the traditional wiring requirement is usually:
- Computer 1 video output A → KVM
- Computer 1 video output B → KVM
- Computer 2 video output A → KVM
- Computer 2 video output B → KVM
- KVM output A → Monitor 1
- KVM output B → Monitor 2
This requirement can be easy to miss when the other computer is a laptop. A laptop may use a USB-C dock, two USB-C display connections, HDMI plus USB-C video, or another arrangement that already generates two display paths before those signals enter the KVM.
The desktop side may look simpler, but it still has to provide the same number of display signals.
If only one desktop video cable is connected to a traditional dual-monitor KVM, one working screen is often the expected result rather than evidence of a defective KVM.
For a broader explanation of why dual-screen setups need separate source-side display paths, see Best KVM Setup for a MacBook and Windows Gaming PC.
3. Keep Video and USB Connections in the Same PC Input Group
Multi-monitor KVM ports are usually organized by computer.
For example, the first computer may have:
- PC1 video input A
- PC1 video input B
- PC1 USB upstream connection
The second computer has another corresponding group.
If one desktop video cable is accidentally connected to a PC1 input while the second video cable is connected to the corresponding PC2 input, the KVM no longer sees them as two displays belonging to the same selected computer.
This can produce confusing symptoms:
- One monitor works and the other stays black.
- A screen appears only after switching to the other PC.
- Keyboard and mouse control the desktop while one monitor still shows the laptop.
- Each individual cable works when tested, but the dual-monitor configuration never works together.
Do not group cables only by connector type. Group them by computer number.
Before troubleshooting software, trace all of the desktop's video and USB connections and confirm that they belong to the same PC input bank on the KVM.
4. Do Not Expect the USB Connection to Carry Video
This is another frequent source of confusion when moving between laptop-oriented devices and conventional desktop KVMs.
On a traditional HDMI or DisplayPort KVM, the computer-side USB connection is normally used for USB data. It allows the active computer to communicate with devices such as:
- Keyboard
- Mouse
- USB storage
- Webcam
- Other supported shared USB peripherals
It does not normally turn the KVM into a USB graphics adapter.
Therefore, this arrangement is incomplete for a traditional dual-monitor KVM:
Desktop → one HDMI/DP cable + one USB-B connection → KVM
The USB connection cannot normally substitute for the missing second HDMI or DisplayPort signal.
This rule should not be confused with USB-C docking products or DisplayLink-based solutions, where video can be transported or generated through a USB-related workflow. Those are different architectures.
If your KVM has conventional HDMI or DisplayPort inputs for each monitor, treat those video inputs as independent requirements.
5. Check HDMI and DisplayPort Adapter Direction
If the desktop and KVM do not use matching video connectors, adapters introduce another possible failure point.
The most important rule is:
Video adapters are not automatically bidirectional.
A cable designed for:
DisplayPort source → HDMI display
should not automatically be expected to work as:
HDMI source → DisplayPort display
The second conversion often requires different electronics, and many HDMI-to-DisplayPort conversions require an active adapter.
Direction matters even if the connectors physically fit the equipment.
Before using an adapter with a KVM, identify four things:
- What connector is the video source?
- What connector does the KVM input require?
- Which direction does the adapter explicitly support?
- Does the adapter support the target resolution and refresh rate?
Adapters can also become the bandwidth limit in a high-refresh workstation. A desktop and KVM may both support a higher display mode while the conversion cable does not.
Whenever possible during troubleshooting, remove conversion hardware and test with native HDMI-to-HDMI or DisplayPort-to-DisplayPort connections first.
6. Test Each Desktop Output Without the KVM
One of the fastest ways to separate a computer problem from a KVM problem is to remove the KVM temporarily.
Test the desktop outputs one at a time:
GPU output 1 → Monitor 1 directly
Then:
GPU output 2 → Monitor 2 directly
Finally, connect both monitors directly to the desktop at the same time.
The desktop should be able to detect and drive both displays in this direct configuration before you expect the KVM to switch them.
This test answers several questions at once:
- Is the GPU output active?
- Does the cable work?
- Does the monitor accept that input?
- Can the desktop detect two displays simultaneously?
- Can it run the desired resolution and refresh rate without the KVM?
If the second monitor does not work even with a direct GPU-to-monitor connection, troubleshoot the desktop, GPU port, adapter, cable, monitor input, or system settings before returning to the KVM.
If both monitors work directly but one fails after the KVM is reintroduced, you have narrowed the problem to the KVM-side cable, port assignment, signal compatibility, EDID behavior, or target display mode.
7. Check Windows and GPU Display Settings
A physically correct connection does not guarantee that Windows will automatically use both displays in the intended mode.
After connecting both desktop video outputs, open Windows display settings and check whether two displays are detected.
Look for three different situations.
The Second Display Is Detected but Disabled
Windows may detect the monitor without extending the desktop onto it. Select an appropriate multi-display mode such as Extend these displays or Duplicate these displays, depending on the intended workflow.
The Second Display Is Not Detected
If Windows sees only one display, return to the physical signal path. Swap GPU ports, cables, and KVM inputs to determine whether the failure follows a specific component.
The Display Appears Differently in the GPU Control Panel
For systems with NVIDIA, AMD, or Intel graphics software, check the vendor's display control panel as well. Confirm that both displays are enabled and that the selected resolution, refresh rate, color format, and other display settings are valid for both paths.
You do not normally need a special driver just to make a conventional hardware KVM switch HDMI or DisplayPort video. You do, however, need a functioning graphics driver capable of detecting and configuring both outputs.
8. Reduce Resolution and Refresh Rate Before Blaming the KVM
If both monitors are detected but one turns black when you select a high refresh rate, the problem has changed.
You are no longer diagnosing whether a second signal exists. You are diagnosing whether the complete signal path can carry the selected display mode.
Temporarily try a conservative configuration such as 1920×1080 at 60Hz on both monitors.
If both displays become stable at that setting, increase the resolution and refresh rate gradually.
The complete video chain matters:
GPU → source cable → adapter if used → KVM input → KVM output → display cable → monitor input
A single weaker component can prevent the target mode from working even when every device successfully displays a lower-bandwidth signal.
For high-refresh troubleshooting, see Why Your KVM Switch Only Shows 60Hz?. If the problem occurs mainly after switching computers rather than during initial detection, EDID Emulation Explained covers monitor detection, window movement, and switching stability in more detail.
Quick Diagnostic Table
| Symptom | Check First | What It Usually Tells You |
|---|---|---|
| Laptop has two screens, desktop has only one | Count desktop video cables | The desktop may be supplying only one video signal to the dual-monitor KVM |
| Desktop has one GPU cable and one motherboard cable | Move both video paths to the dedicated GPU | The motherboard output may be inactive or using a separate graphics device |
| Keyboard and mouse work, but monitors do not | Check HDMI/DP paths separately from USB | The USB upstream link can work even when the video path is missing |
| One screen appears on the wrong KVM selection | Check PC1/PC2 input grouping | One video cable may be connected to the wrong computer input group |
| Display works directly but not through an adapter | Verify conversion direction and supported mode | The HDMI/DP adapter may be directional or bandwidth-limited |
| Both screens work at 1080p60 but fail at higher refresh rates | Check the full display chain | The issue is more likely bandwidth, cable, adapter, EDID, or display-mode compatibility |
| Both direct connections work but one KVM path stays black | Swap KVM inputs and cables | The failure has been narrowed to the KVM-side path or compatibility |
Which TESmart KVM Fits This Type of Desktop Setup?
The troubleshooting logic above applies to conventional dual-monitor and triple-monitor KVMs in general. When selecting a TESmart model, the most useful question is not simply which unit supports two screens. It is which video structure most closely matches the computers and monitors already on the desk.
DKS202-M24 for DisplayPort Desktop Workstations
If both computers can provide the required DisplayPort signals directly from their graphics hardware, the DKS202-M24 is more suitable for a two-computer, two-monitor DisplayPort workstation.
This path makes particular sense for gaming PCs and professional desktops that already provide multiple native DisplayPort outputs. Using native GPU outputs also avoids unnecessary HDMI/DP conversion stages.
Before choosing it, confirm that each computer can supply the required number of DisplayPort video signals. A laptop without native DisplayPort outputs may require USB-C-to-DisplayPort conversion or another compatible source-side arrangement.
HKS202 Series for HDMI-Based Dual-Monitor Desks
If both computers and both monitors fit an HDMI-centered signal path, the HKS202 series is the more direct option.
For standard dual-monitor HDMI use, the HKS202-P23 fits two-computer, two-monitor 4K60-class setups.
For users whose priority includes higher-bandwidth HDMI 2.1 display modes, the HKS202-M24 is the more appropriate HKS202 path.
The same signal rule still applies: two monitors require the desktop side to provide the required video feeds. An HDMI KVM cannot generate a missing second GPU output.
HDK202-M24 for Mixed HDMI and DisplayPort Paths
The HDK202-M24 is more suitable when the workstation benefits from a mixed HDMI and DisplayPort connection structure rather than an all-HDMI or all-DisplayPort path.
This can be useful with modern discrete GPUs that provide both interface types, but the same pre-check remains important: confirm which two physical GPU outputs will be used, which KVM inputs they map to, and whether both direct connections support the target display mode before introducing the KVM.
The Same Rule Applies to Triple-Monitor KVMs
A triple-monitor KVM increases the number of required signal paths rather than changing the basic principle.
If a conventional three-monitor KVM expects three source-side video inputs for each computer, the desktop must provide three usable display signals. Connecting one or two video outputs and adding a USB cable does not automatically create the remaining independent desktop.
This is why counting GPU outputs should happen before comparing multi-monitor KVM specifications.
If you are still deciding between HDMI, DisplayPort, USB-C, and different dual-monitor product families, see How to Choose the Right Dual Monitor KVM for 2 Computers.

Related TESmart Guides
This article is intentionally focused on desktop-side signal tracing. The following guides cover related problems in more depth:
- How to Set Up a KVM Switch: Detailed Step-by-Step Guide — for the complete initial wiring process.
- Best KVM Setup for a MacBook and Windows Gaming PC — for mixed laptop and gaming desktop signal paths.
- Can You Use a Docking Station With a KVM Switch? — for laptops that generate their monitor signals through a dock.
- Why Your KVM Switch Only Shows 60Hz? — when both monitors work but the expected refresh rate does not.
- EDID Emulation Explained — when displays disappear, reconnect slowly, or change layout after switching.
FAQ
Q1: Do I need to install KVM software or a driver on my desktop?
Usually not for a conventional HDMI or DisplayPort hardware KVM. Video is supplied by the computer's graphics outputs, while USB handles keyboard, mouse, and other supported peripheral data. Your normal GPU driver still needs to detect and configure both monitors correctly.
Q2: Why does my keyboard work through the KVM when the monitor has no signal?
Because USB and video are separate signal paths on a traditional KVM. A successful USB connection proves that the desktop can communicate with the KVM's USB subsystem, but it does not prove that an HDMI or DisplayPort video signal is reaching the monitor.
Q3: Can I connect one KVM monitor input to my graphics card and the second to the motherboard?
It may be possible on a computer intentionally configured to use both integrated and discrete graphics, but it is not the preferred starting point for troubleshooting. The motherboard display output depends on integrated graphics support and system configuration. For a gaming PC or workstation with a dedicated GPU, using two outputs from the same graphics card is normally the cleaner configuration.
Q4: Why does the laptop need fewer obvious video cables than the desktop?
The laptop may be using USB-C, a dock, or another multi-display architecture before the signals reach the KVM. What matters is not the number of connectors visible at first glance, but how many independent display signals the computer or dock actually provides to the KVM.
Q5: Can a DP-to-HDMI cable be used backward as HDMI-to-DP?
Do not assume so. Video conversion cables and adapters can be directional. Check the specified source and display direction before using one in a KVM path. HDMI-to-DisplayPort conversion in particular may require an active converter.
Q6: Both desktop monitors work directly. Why does one fail through the KVM?
At that point, check the KVM-side path rather than the basic GPU capability. Swap source cables, KVM input ports, and output paths one at a time. Also test a lower resolution and refresh rate. If the failure follows a specific cable or KVM path, you have isolated the likely problem. If it appears only at higher display modes, investigate bandwidth, adapter, cable, and EDID compatibility.
Q7: Does a dual-monitor KVM turn one GPU output into two extended monitors?
Not in a conventional multi-input HDMI or DisplayPort KVM architecture. The KVM switches the display signals supplied by the source computer. If the KVM requires two source-side video inputs for dual monitors, the computer must provide two usable display signals.
Conclusion
When a dual-monitor KVM works with a laptop but not with a desktop, start with the desktop's physical video path rather than assuming the KVM needs software.
The fastest sequence is:
- Verify that both video cables come from active outputs on the dedicated GPU.
- Confirm that the desktop can drive both monitors directly without the KVM.
- Make sure both video feeds and the USB upstream connection belong to the same KVM PC input group.
- Treat USB and video as separate connections on a conventional HDMI/DP KVM.
- Remove adapters temporarily and verify HDMI/DisplayPort conversion direction.
- Confirm that Windows and the GPU driver have enabled the second display.
- Test at a lower resolution and refresh rate before investigating higher-bandwidth compatibility.
The main principle is simple: a multi-monitor KVM can switch the signals your computer supplies, but it cannot repair a missing GPU output or create an additional traditional HDMI/DisplayPort video path.
Once both desktop outputs work directly, the remaining KVM troubleshooting becomes much more targeted—and much easier to solve.
Share:
Can Apple Studio Display Connect to a Windows PC? Share One Display Between Mac and Windows
Can a KVM Run Three 1080p 240Hz Monitors? What to Check Before You Buy