Table of Contents
- Introduction
- Start With Three Questions: Monitor Count, MacBook Output, and Gaming Refresh Rate
- Single-Monitor Setup: The Simplest MacBook and Gaming PC KVM
- Dual-Monitor Setup: Check the MacBook Before Choosing the KVM
- High-Refresh Gaming Setup: Keep the Windows GPU Path Direct
- Where the Dock Should Sit in the Signal Chain
- Choose the KVM by Interface, Not by the “Mac-Compatible” Label
- Which TESmart Solution Fits the Setup?
- Common MacBook and Gaming PC KVM Setup Mistakes
- Conclusion
- Related Guides
- FAQ
Introduction
Sharing a monitor, keyboard, mouse, and USB devices between a MacBook and a Windows gaming PC sounds like a basic two-computer KVM setup. The difficulty is that the two computers usually send video in different ways.
The gaming PC normally connects directly from a dedicated graphics card through HDMI or DisplayPort. A MacBook usually outputs video through USB-C, a port compatible with Thunderbolt devices, an HDMI port on selected models, or a dock or adapter.
The correct KVM setup therefore depends on three factors:
- How many monitors need to be shared
- How the MacBook produces each required video signal
- What resolution and refresh rate the gaming PC must preserve
A single-monitor 4K 60Hz setup has very different requirements from a dual-monitor workstation or a 1440p 240Hz gaming desk. Choosing a KVM only because it is described as “Mac compatible” does not confirm that the complete display chain will work.
This guide explains how to build the signal path for single-monitor, dual-monitor, and high-refresh-rate setups using ordinary HDMI or DisplayPort monitors. It does not cover Apple Studio Display or other displays that require a Thunderbolt-compatible display connection.
Start With Three Questions: Monitor Count, MacBook Output, and Gaming Refresh Rate
Before comparing KVM specifications, map the workstation as a set of physical signal paths.
1. How Many Monitors Will Be Shared?
A single-monitor KVM needs one video connection from each computer. A dual-monitor KVM usually needs two independent video signals from each computer. A three-monitor KVM normally needs three.
The KVM does not create additional display outputs for the computers. It switches the video signals that the computers already provide.
This distinction matters most on the MacBook side. A gaming desktop may have several outputs on its graphics card, while the MacBook may need separate USB-C video adapters, a suitable dock, or a DisplayLink-based solution to produce the required number of displays.
2. How Will the MacBook Output Video?
Depending on the MacBook model and desk design, the Mac side may use:
- A USB-C to HDMI cable
- A USB-C to DisplayPort cable
- The MacBook’s built-in HDMI port, when available
- A dock compatible with the MacBook’s USB-C or Thunderbolt connection
- A DisplayLink dock for additional software-driven displays
The presence of a USB-C connector does not by itself confirm video support. The port, cable, adapter, and dock must support the required video mode.
3. What Refresh Rate Must the Gaming PC Preserve?
A work monitor running at 4K 60Hz places different demands on the signal chain than a gaming monitor running at 1440p 165Hz, 1440p 240Hz, or 4K 144Hz.
The gaming result depends on the complete chain:
GPU output → video cable → KVM input → KVM output → second video cable → monitor input
Every component must support the target resolution, refresh rate, color format, and optional features such as HDR, DSC, and variable refresh rate. The lowest-capability component determines the final display mode.

Single-Monitor Setup: The Simplest MacBook and Gaming PC KVM
A single-monitor setup is the easiest configuration because each computer needs only one video output and one USB upstream connection.
Recommended Signal Path
A typical HDMI setup looks like this:
MacBook → USB-C-to-HDMI adapter or cable → KVM input 1
Gaming PC GPU → HDMI cable → KVM input 2
KVM output → HDMI monitor
A DisplayPort setup follows the same structure:
MacBook → USB-C-to-DisplayPort cable → KVM input 1
Gaming PC GPU → DisplayPort cable → KVM input 2
KVM output → DisplayPort monitor
The MacBook and gaming PC must also have USB upstream connections to the KVM. These connections carry keyboard, mouse, and shared USB data. A video connection alone cannot make the keyboard and mouse switch between computers.
HDMI or DisplayPort for a Single Gaming Monitor?
HDMI is often the practical choice when the monitor, gaming PC, and other devices already use HDMI. It is also useful when the desk may later include a game console.
DisplayPort often makes more sense when the gaming monitor reaches its highest refresh rate through DisplayPort or when the graphics card’s HDMI ports are already occupied.
Check the monitor manual before deciding. Some monitors support the same resolution through both inputs but reserve their maximum refresh rate, HDR mode, or variable refresh rate range for one specific port.
Do You Need a High-Bandwidth KVM?
For a normal 4K 60Hz work-and-gaming setup, a 4K 60Hz single-monitor KVM may be sufficient.
For higher refresh rates or future display upgrades, a higher-bandwidth model may make more sense. However, an “8K 60Hz” specification should not automatically be interpreted as confirmation of every lower-resolution high-refresh mode. Verify the exact timing, color format, DSC requirements, and gaming features supported by the selected model.

Dual-Monitor Setup: Check the MacBook Before Choosing the KVM
A dual-monitor KVM is not simply a single-monitor KVM with a second output. In most configurations, each computer must provide two independent video signals to the KVM.
Count the Video Connections First
A conventional dual-monitor setup normally requires:
- Two video connections from the gaming PC to the KVM
- Two video connections from the MacBook or its dock to the KVM
- Two video connections from the KVM to the monitors
- One USB upstream connection from each computer
The gaming PC side is usually straightforward. Connect two outputs directly from the dedicated graphics card to the KVM. Do not connect one monitor through the graphics card and the other through the motherboard unless the system has been intentionally configured to use both graphics devices.
The MacBook side requires more planning because external display support varies by MacBook model, chip generation, operating mode, and whether the built-in display remains active.
Confirm the MacBook’s External Display Limit
Before buying a dual-monitor KVM, confirm that the MacBook can natively drive the required number of external displays in the intended configuration.
Important questions include:
- Does the MacBook support one or two external displays?
- Does that limit change when the lid is closed?
- Can the dock produce two independent native video streams?
- Does one of the proposed outputs duplicate another display?
A dual-monitor KVM cannot overcome the MacBook’s display-engine limit. If the MacBook supplies only one independent video stream, connecting it to two KVM inputs will not automatically create an extended desktop.
Why MST Docks Behave Differently on macOS
Many Windows docks use DisplayPort Multi-Stream Transport, or MST, to split one DisplayPort connection into multiple independent displays. Windows can use this structure when the computer, graphics hardware, dock, and displays support it.
macOS generally does not use MST to create separate extended desktops from one DisplayPort stream. A dock that produces two extended monitors on a Windows laptop may therefore produce mirrored displays or only one active display on a MacBook.
For a native dual-monitor Mac setup, each display normally needs an independent video stream supported by the MacBook and the chosen dock or adapter arrangement.
When DisplayLink Is Used
DisplayLink sends compressed display data through USB and reconstructs the image through a dock or adapter. It can provide additional displays when native video outputs are limited, but it requires software and should not be treated as equivalent to a direct GPU display connection.
DisplayLink can be appropriate for productivity applications, documents, communication tools, and static desktop content. It is less suitable when the priority is low latency, color-critical work, high-refresh animation, protected video compatibility, or gaming.
In a MacBook and gaming PC setup, DisplayLink should normally remain on the Mac productivity side. The gaming PC should continue using native outputs from the graphics card.
What About Three Monitors?
The same rule continues with three displays: each computer must provide three usable display streams, and the KVM must accept and switch three video inputs per computer.
Before selecting a three-monitor KVM, verify the MacBook’s display support first. Otherwise, the KVM may be correctly connected while the MacBook still activates only one or two screens.

High-Refresh Gaming Setup: Keep the Windows GPU Path Direct
The Windows gaming path should be as direct as possible:
Gaming PC GPU → KVM → gaming monitor
Avoid routing the gaming PC through a general-purpose USB-C dock before the KVM. Many docks are designed around office displays and may limit refresh rate, color format, HDR, VRR, or the number of available display streams.
Why a 144Hz Monitor May Drop to 60Hz
A refresh-rate drop usually means that one part of the chain cannot negotiate the requested display mode. Common causes include:
- The KVM does not support the required timing or bandwidth
- One cable supports 4K 60Hz but not the requested high-refresh mode
- The monitor’s selected input has a lower specification
- The MacBook adapter or dock limits the shared output
- HDR or a high color depth pushes the link beyond its available bandwidth
- DSC is required but is not supported across the complete chain
- The operating system has returned to a conservative display mode after reconnection
Test the gaming PC directly with the monitor at the target settings before adding the KVM. This confirms that the GPU, monitor input, and first cable can produce the required result.
After inserting the KVM, test with short cables and only one monitor. Additional adapters, extensions, converters, and wall plates should be added only after the basic path is stable.
HDMI or DisplayPort for High Refresh Rates?
The answer depends on the actual ports available on the graphics card and monitor, not only on the interface name.
An HDMI gaming path may be preferable when:
- The monitor reaches its target mode through an HDMI 2.1 input
- The desk also includes a PlayStation or Xbox
- The required HDR or VRR implementation is confirmed over HDMI
A DisplayPort path may be preferable when:
- The gaming monitor reserves its highest refresh rate for DisplayPort
- The graphics card has multiple DisplayPort outputs for a multi-monitor setup
- The workstation uses DisplayPort-based PC monitors throughout the chain
Do not mix HDMI and DisplayPort through conversion unless there is a clear need. Active conversion adds another negotiation stage and may affect high-refresh, HDR, DSC, HDCP, or variable refresh rate behavior.
Check VRR, HDR, and DSC Separately
Resolution and refresh rate are only part of gaming compatibility.
A KVM may display 4K at a high refresh rate while still having different limitations for HDR, adaptive sync, G-SYNC Compatible operation, FreeSync, or Display Stream Compression. Confirm these features individually when they are required.
For competitive gaming, test the exact mode you plan to use rather than relying on the maximum headline resolution alone.

Where the Dock Should Sit in the Signal Chain
In most MacBook and gaming PC workstations, the dock belongs on the MacBook side:
MacBook → Dock or adapter → KVM → Monitor
The dock converts or distributes the MacBook’s available display and USB connections. The KVM then switches those signals between the MacBook and gaming PC.
A Dock and a KVM Solve Different Problems
A dock expands the ports of one computer. A KVM switches monitors and peripherals between multiple computers.
A dock may give the MacBook HDMI, DisplayPort, Ethernet, USB, and charging connections, but it does not automatically switch those devices to the gaming PC. A KVM may switch two computers, but it does not automatically create the additional display outputs the MacBook lacks.
Some workstations therefore need both devices:
MacBook expansion through the dock + multi-computer switching through the KVM
Reduce Unnecessary Conversion Layers
A chain such as the following creates several points of failure:
MacBook → multiport hub → video adapter → extension cable → KVM → converter → monitor
Each additional device can change EDID communication, available bandwidth, power behavior, or USB enumeration.
Use a direct USB-C-to-HDMI or USB-C-to-DisplayPort cable when one output is sufficient. Use a dock when the MacBook genuinely needs multiple display outputs, charging, Ethernet, or additional USB ports.
Do Not Forget the USB Upstream Path
In a conventional HDMI or DisplayPort KVM, video and USB are separate signal paths.
The MacBook may therefore need:
- One or more video connections to the KVM
- A separate USB upstream connection for keyboard, mouse, and shared peripherals
- A separate charging connection when the dock or KVM does not provide the required power
Some USB-C-oriented KVM configurations can combine several functions into fewer cables, but the exact video, USB data, and charging capabilities must be confirmed for the selected model.

Choose the KVM by Interface, Not by the “Mac-Compatible” Label
“Mac compatible” is not enough information for choosing a KVM. The correct question is whether the KVM matches the physical outputs and display requirements of both computers.
| Setup | MacBook Connection | Gaming PC Connection | KVM Category | Main Check |
|---|---|---|---|---|
| Single HDMI monitor | USB-C to HDMI or native HDMI | GPU HDMI | Single-monitor HDMI KVM | Target resolution and refresh rate |
| Single DisplayPort monitor | USB-C to DisplayPort | GPU DisplayPort | Single-monitor DisplayPort KVM | Adapter and high-refresh support |
| Dual HDMI monitors | Two independent outputs from a dock or adapters | Two direct GPU outputs | Dual-monitor HDMI KVM | MacBook external display limit |
| Dual DisplayPort monitors | Two supported USB-C or dock-based DP outputs | Two direct GPU DP outputs | Dual-monitor DisplayPort KVM | Native streams, MST limits, and bandwidth |
| Mixed laptop and desktop workflow | USB-C video input where supported | HDMI or DisplayPort from the GPU | Mixed-input or USB-C-oriented KVM | Exact input mapping and DP Alt Mode |
| High-refresh gaming monitor | Adapter matched to the monitor interface | Direct GPU output | Higher-bandwidth HDMI or DP KVM | Exact refresh rate, HDR, DSC, and VRR support |
HDMI KVM
An HDMI KVM is suitable when both computers can provide HDMI signals and the monitors reach the required display mode through HDMI.
The MacBook may connect through a USB-C-to-HDMI cable, a suitable dock, or a built-in HDMI port. The gaming PC should connect directly from the graphics card.
DisplayPort KVM
A DisplayPort KVM is more suitable for workstations built around DisplayPort gaming monitors and multi-output desktop graphics cards.
Most MacBooks do not provide a full-size DisplayPort connector, so the Mac side normally requires USB-C-to-DisplayPort cables or a dock that produces supported DisplayPort outputs.
USB-C and Mixed-Input KVM
A USB-C-oriented or mixed-input KVM can reduce the number of adapters on the MacBook side. However, verify that the USB-C input accepts video and is not limited to USB data.
Also confirm how many display streams the USB-C input carries, whether charging is provided, and whether the gaming PC still has a direct high-bandwidth video path.

Which TESmart Solution Fits the Setup?
The appropriate TESmart model depends first on monitor count and interface. Product specifications should then be checked against the exact refresh rate and feature requirements.
For a Single HDMI Monitor
If the setup includes two computers and one HDMI monitor at up to 4K 60Hz, the TESmart HKS201-P23 fits the basic connection structure.
The MacBook can connect through a suitable USB-C-to-HDMI path, while the gaming PC connects directly from its graphics card. This category is more suitable when the monitor is primarily used for office work, development, content review, or gaming at moderate display settings.
For users who need a higher-bandwidth single-monitor category, the HKS201-M24 supports a higher maximum display specification. The exact gaming timing, DSC behavior, HDR, and variable refresh rate requirements should still be verified before purchase.
For Two HDMI Monitors
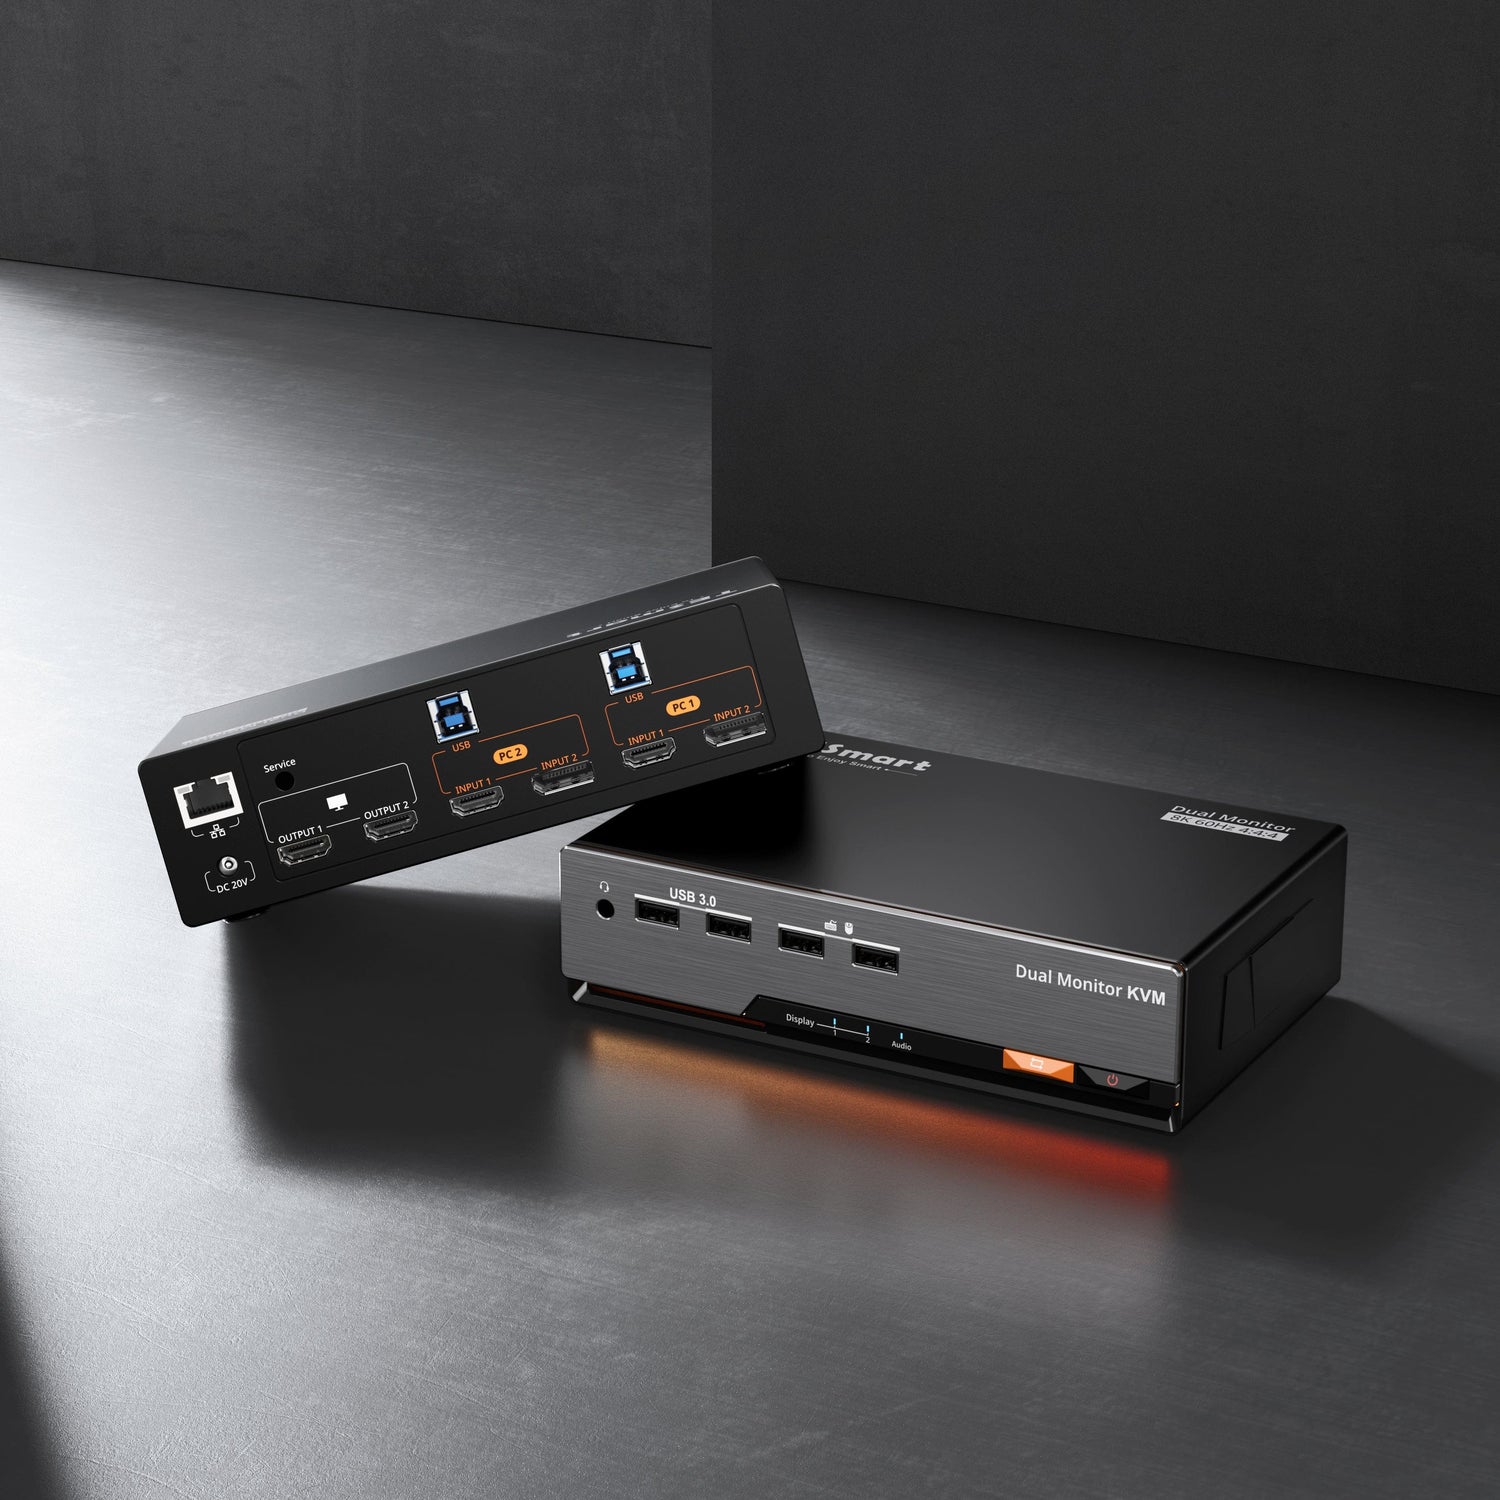
The HDK202-P23 is structured for two computers sharing two monitors at up to 4K 60Hz.
This is more suitable for a dual-monitor productivity setup where the gaming PC and MacBook can each provide two independent HDMI-compatible video signals.
For a higher-bandwidth dual-monitor HDMI category, the HDK202-M24 is designed around a higher maximum display specification. It makes more sense when the workstation needs capabilities beyond a basic dual 4K 60Hz configuration, subject to confirmation of the exact required timings.
For Two DisplayPort Monitors
The DKS202-M24 is a two-computer, dual-monitor DisplayPort model intended for higher-specification multi-display workstations.
This category is more suitable when the gaming PC uses direct DisplayPort outputs and the monitors reach their preferred gaming modes through DisplayPort.
On the MacBook side, plan for USB-C-to-DisplayPort cables or an appropriate dock. Confirm that the MacBook can produce two independent display streams before selecting the KVM.
For USB-C or Mixed Laptop Connections
Users who want to reduce MacBook adapters can consider TESmart’s HDC or CKS product categories, including models such as the HDC202-P23 and CKS202-P23.
These categories are more relevant to laptop-oriented or mixed-interface desks, but the exact PC input arrangement should be checked before purchase. Confirm whether each USB-C connection carries video, USB data, or both, and confirm how the Windows gaming PC connects to each monitor.
For Three Monitors
For users whose MacBook and gaming PC can each provide three display signals, models such as the DKS203-M24 extend the same decision logic to a three-monitor DisplayPort workstation.
This configuration should only be considered after confirming the MacBook’s external display capability. A three-monitor KVM cannot turn one MacBook display stream into three native extended displays.
Consider EDID Stability for Work-and-Gaming Desks
When switching between macOS and Windows, EDID handling can affect display re-detection, window placement, resolution selection, and black-screen duration.
For a desk used throughout the day, EDID emulation or display-state retention can reduce unnecessary reconnection behavior. Treat it as a selection criterion rather than assuming every KVM handles display identity in the same way.

Common MacBook and Gaming PC KVM Setup Mistakes
The MacBook Activates Only One External Monitor
Likely cause: The MacBook does not support the requested number of native external displays, or the dock relies on MST.
What to check: Connect the monitors directly through the proposed MacBook adapters or dock before adding the KVM. Confirm that both displays operate as an extended desktop.
Possible solution: Use separate native video streams supported by the MacBook, operate in the required lid mode, or use DisplayLink when its software-based display method is acceptable.
The Two Mac Displays Are Mirrored
Likely cause: The dock is splitting one stream through MST, which does not provide the expected extended-desktop behavior on macOS.
What to check: Review the dock’s documentation and identify whether both video outputs are native independent streams or an MST split.
Possible solution: Use two independent MacBook display outputs or a supported DisplayLink configuration.
The Gaming Monitor Drops from 144Hz or 240Hz to 60Hz
Likely cause: One component in the chain cannot support the target timing, or the display mode requires more bandwidth than the negotiated link provides.
What to check: Test the gaming PC directly with the monitor. Then reconnect the KVM using short cables and disable HDR temporarily. Confirm the selected input and refresh-rate settings in Windows and the monitor menu.
Possible solution: Replace the limiting cable or adapter, use the monitor’s higher-capability input, reduce unnecessary conversion, or select a KVM verified for the exact gaming mode.
The Monitor Switches but the Keyboard and Mouse Do Not
Likely cause: One computer does not have a USB upstream connection to the KVM, or the USB focus is configured independently from video.
What to check: Confirm that both the MacBook and gaming PC have working USB data connections to the KVM. A charging-only USB cable will not carry keyboard or mouse data.
Possible solution: Replace the cable with a USB data cable and review the KVM’s USB focus or switching mode.
The Dock Has Two Ports but Only One Valid Display Signal
Likely cause: The second port may mirror the first, share one MST stream, or have a lower display capability.
What to check: Test both dock outputs as an extended desktop before connecting them to the KVM.
Possible solution: Use a dock designed to provide the required independent Mac display streams, or connect one monitor through a separate USB-C video output.
The KVM Produces a Black Screen or Intermittent Signal
Likely cause: The chain exceeds its supported resolution or refresh rate, the adapter is incompatible, the cable is marginal, or EDID negotiation has failed.
What to check: Test at 1080p 60Hz, remove the dock, use shorter cables, and connect each computer directly to the monitor.
Possible solution: Rebuild the chain one device at a time, beginning with the direct monitor connection. Add the KVM before adding the dock, extension cable, or other adapters.
Conclusion
The right KVM setup for a MacBook and Windows gaming PC is determined by the display chain, not by a general compatibility label.
For a single monitor, the main task is matching HDMI or DisplayPort between the MacBook adapter, gaming PC, KVM, and monitor.
For dual monitors, verify that the MacBook can produce two independent display streams before buying the KVM. A dual-monitor switch cannot bypass the MacBook’s display limitations or convert one MST stream into two native macOS extended displays.
For high-refresh gaming, keep the Windows graphics card connected directly to the KVM and keep the chain short. Confirm the required refresh rate, HDR, DSC, and variable refresh rate behavior separately.
A practical selection order is:
- Count the computers and monitors
- Confirm the MacBook’s available display streams
- Identify the monitor inputs that support the required gaming mode
- Choose HDMI, DisplayPort, or a mixed USB-C connection structure
- Select a KVM that supports the exact display and USB requirements
Following this order prevents a common mistake: choosing a KVM first and trying to make the MacBook, dock, graphics card, and monitors fit around it afterward.
Related Guides
Why Dual-Monitor KVM Setups Need Two Video Connections from Each Computer
Why a MacBook Works Directly but Fails Through a Dock
Why Your Gaming Monitor Drops from 144Hz to 60Hz Through a KVM
HDMI vs DisplayPort for KVM Switches: What Actually Changes?
What EDID Means in a Multi-Computer Workstation
FAQ
Q1: Can a MacBook and gaming PC share one monitor and keyboard?
Yes. Connect one video output from each computer to a single-monitor KVM, connect the KVM to the monitor, and provide a USB upstream connection from each computer for the keyboard, mouse, and shared USB devices.
Q2: Can I connect a MacBook to a DisplayPort KVM?
Yes. Most MacBooks require a USB-C-to-DisplayPort cable or a compatible dock because they do not have a full-size DisplayPort connector. The cable or dock must support the required resolution and refresh rate.
Q3: Why does my dual-monitor KVM show only one MacBook display?
The MacBook may support only one external display in the current configuration, or the dock may use MST to split one stream. Test the two MacBook display outputs without the KVM before troubleshooting the switch.
Q4: Can a DisplayLink dock be used with a KVM?
It can be used for productivity displays when the required driver is installed. DisplayLink is a USB graphics method rather than a native GPU output, so it may not be appropriate for high-refresh gaming, low-latency work, or every protected-content workflow.
Q5: Why does my gaming monitor run at only 60Hz through the KVM?
The KVM, cable, adapter, monitor input, or selected display format may not support the requested high-refresh mode. Test the PC directly with the monitor, then add the KVM using short cables and the same port settings.
Q6: Should the gaming PC connect through the same dock as the MacBook?
Usually not. The gaming PC should connect directly from its dedicated graphics card to the KVM. The dock belongs on the MacBook side when it is needed for video conversion, multiple display outputs, USB expansion, charging, or Ethernet.
Q7: Does an 8K 60Hz KVM automatically support 4K 144Hz?
Not necessarily. Different display modes can depend on timing, color format, chroma, DSC, HDR, and interface implementation. Confirm that the selected model supports the exact resolution and refresh rate required by the monitor.
Q8: Is HDMI or DisplayPort better for a MacBook and gaming PC KVM?
Use the interface that both computers can supply and that allows the monitor to reach its required gaming mode. HDMI is practical for mixed PC and console desks, while DisplayPort is common in high-refresh PC and multi-monitor graphics-card setups.